

[mac] Install iTerm2
Install iTemr2 on your Mac and create a colorful terminal with oh-my-zsh.
I will install it using brew.
If Homebrew is not installed, please install it following this post and come back.
Now, enter the command below into the terminal to install it.
1brew install iterm2
To apply various themes or functions such as autocomplete in iterm2, install oh-my-zsh, one of the zsh (Z shell) plugins.
1sh -c "$(curl -fsSL https://raw.github.com/robbyrussell/oh-my-zsh/master/tools/install.sh)"
3-1. Choose a color scheme
Check and download various color schemes at the official Site.
Personally, I like pastel tones, so I downloaded and used the Snazzy color scheme below.
Download Snazzy ThemeIf you download any theme, double-click it and it will automatically be added to iTerm2's iTerm Color Preset.
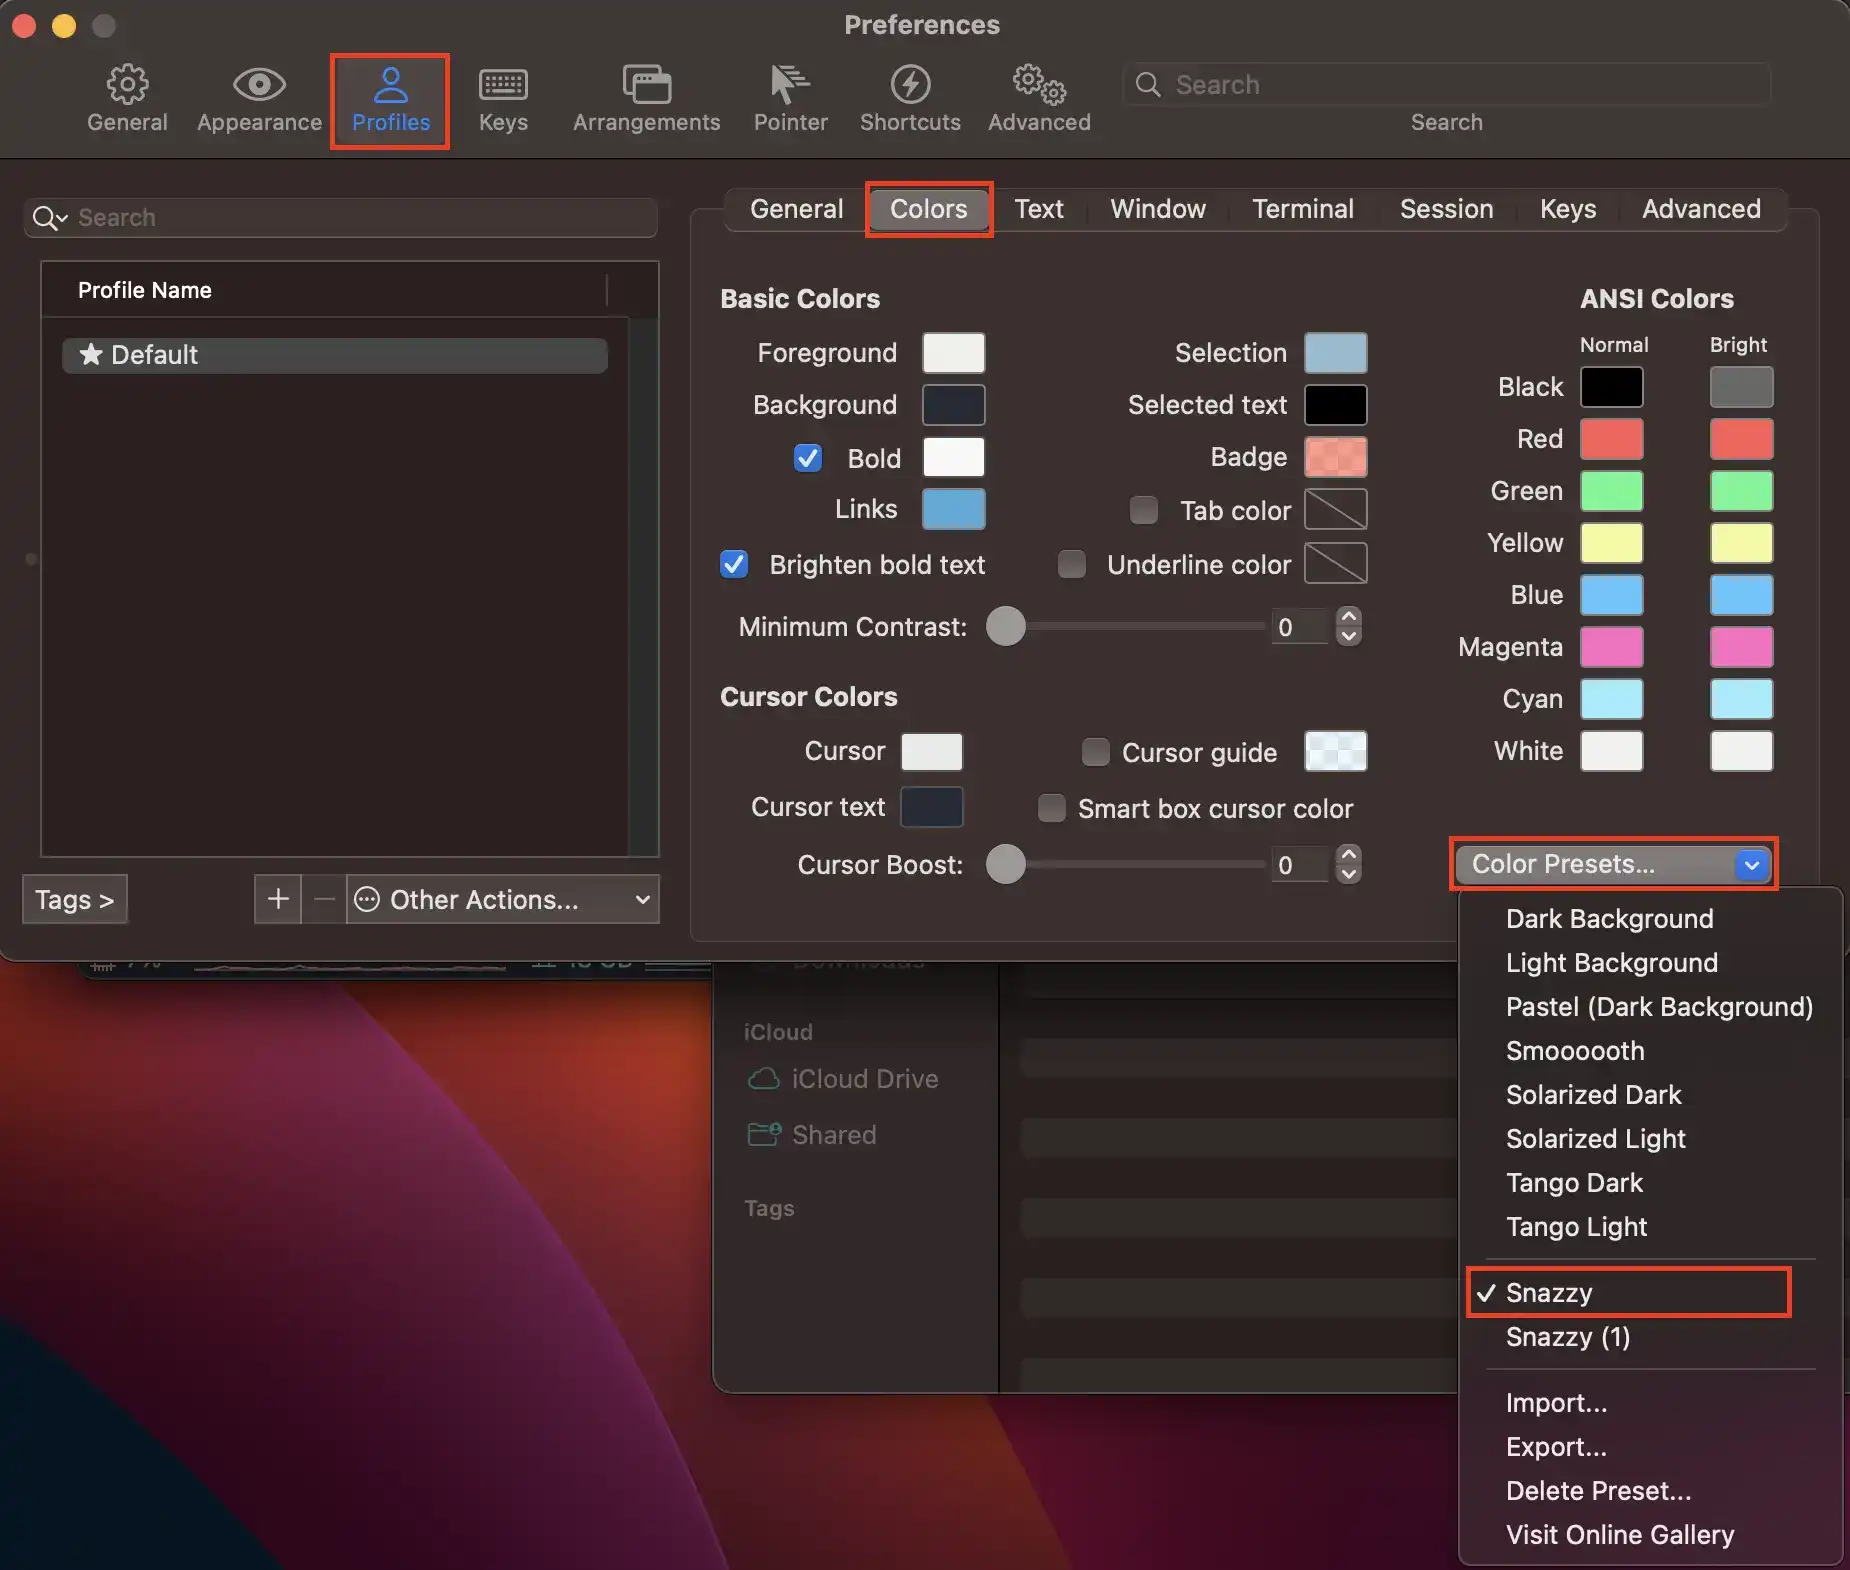
To check, run iTerm2 and press ⌘ + , together.
Then, in the window shown below, select Profile -> Colors -> Color Presets... -> Snazzy (or the downloaded color scheme).
3-2. Prevent Hangul from being broken
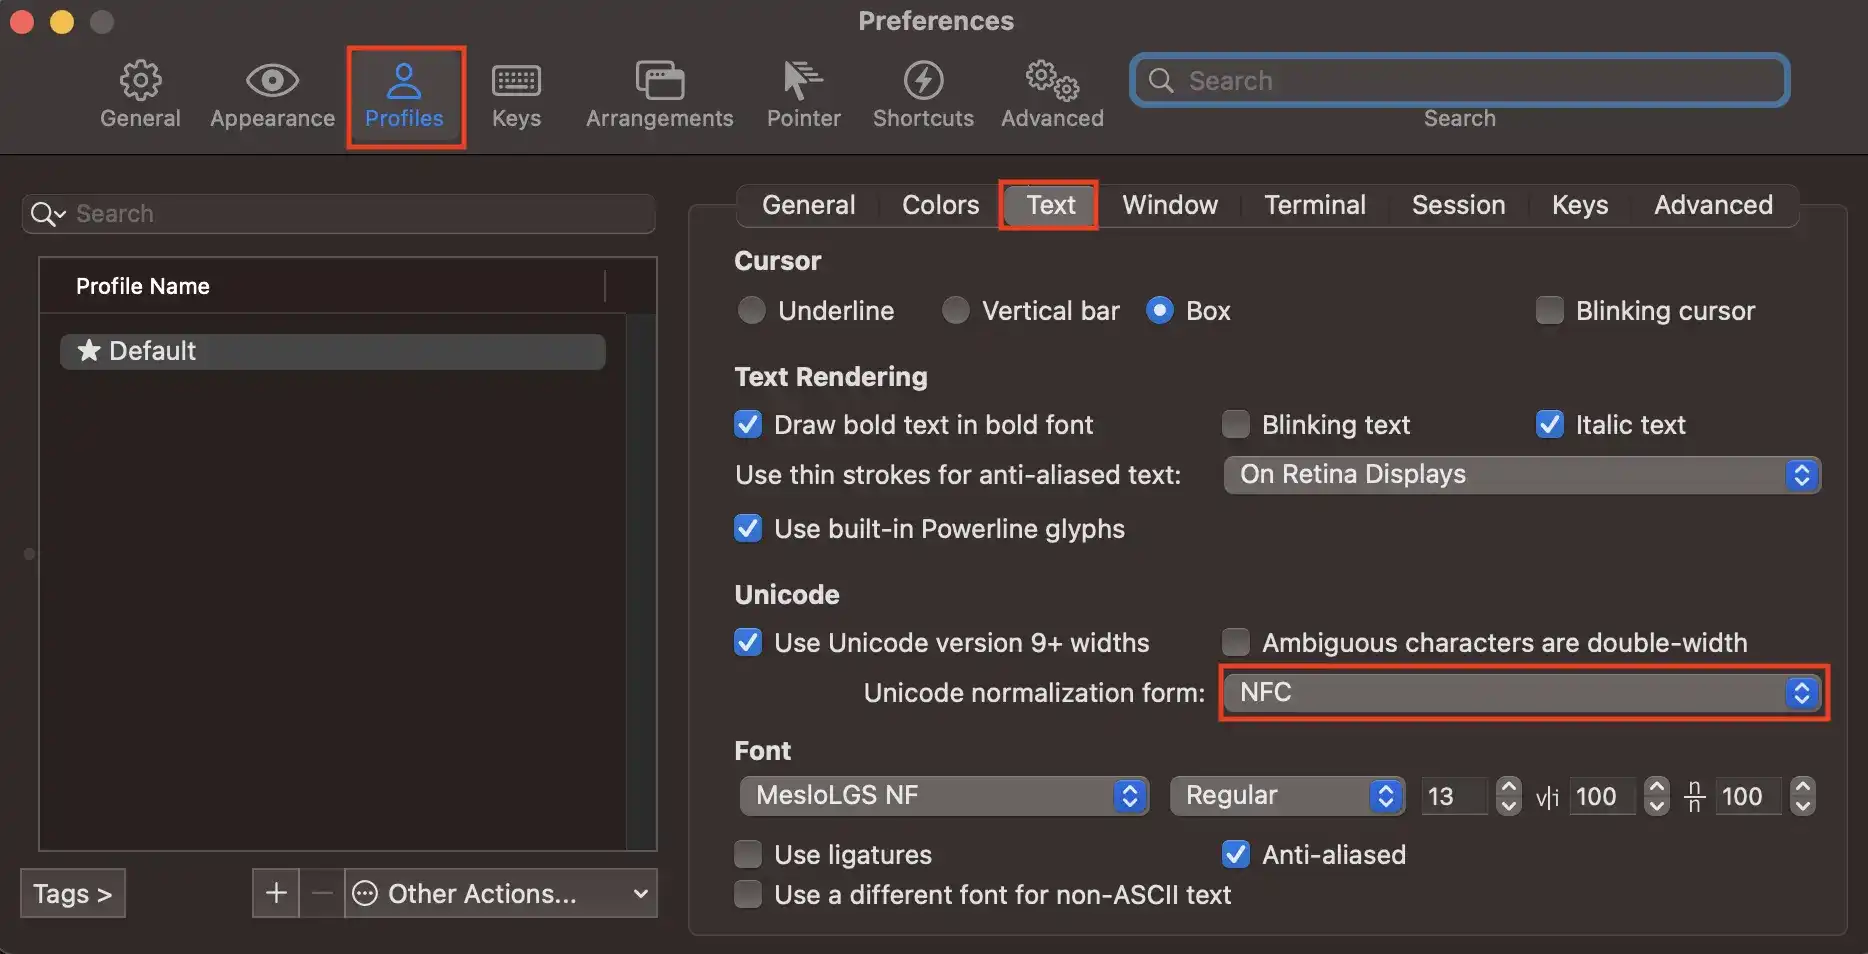
There are many cases where Hangul is broken in the terminal, so please set the following to prevent Hangul from being broken.
In the window above, change to Profile -> Text -> Unicode normalization form: NFC.
3-3. Add status bar
In the window above, check Profile -> Session -> Status bar enabled and click Configure Status Bar on the right.
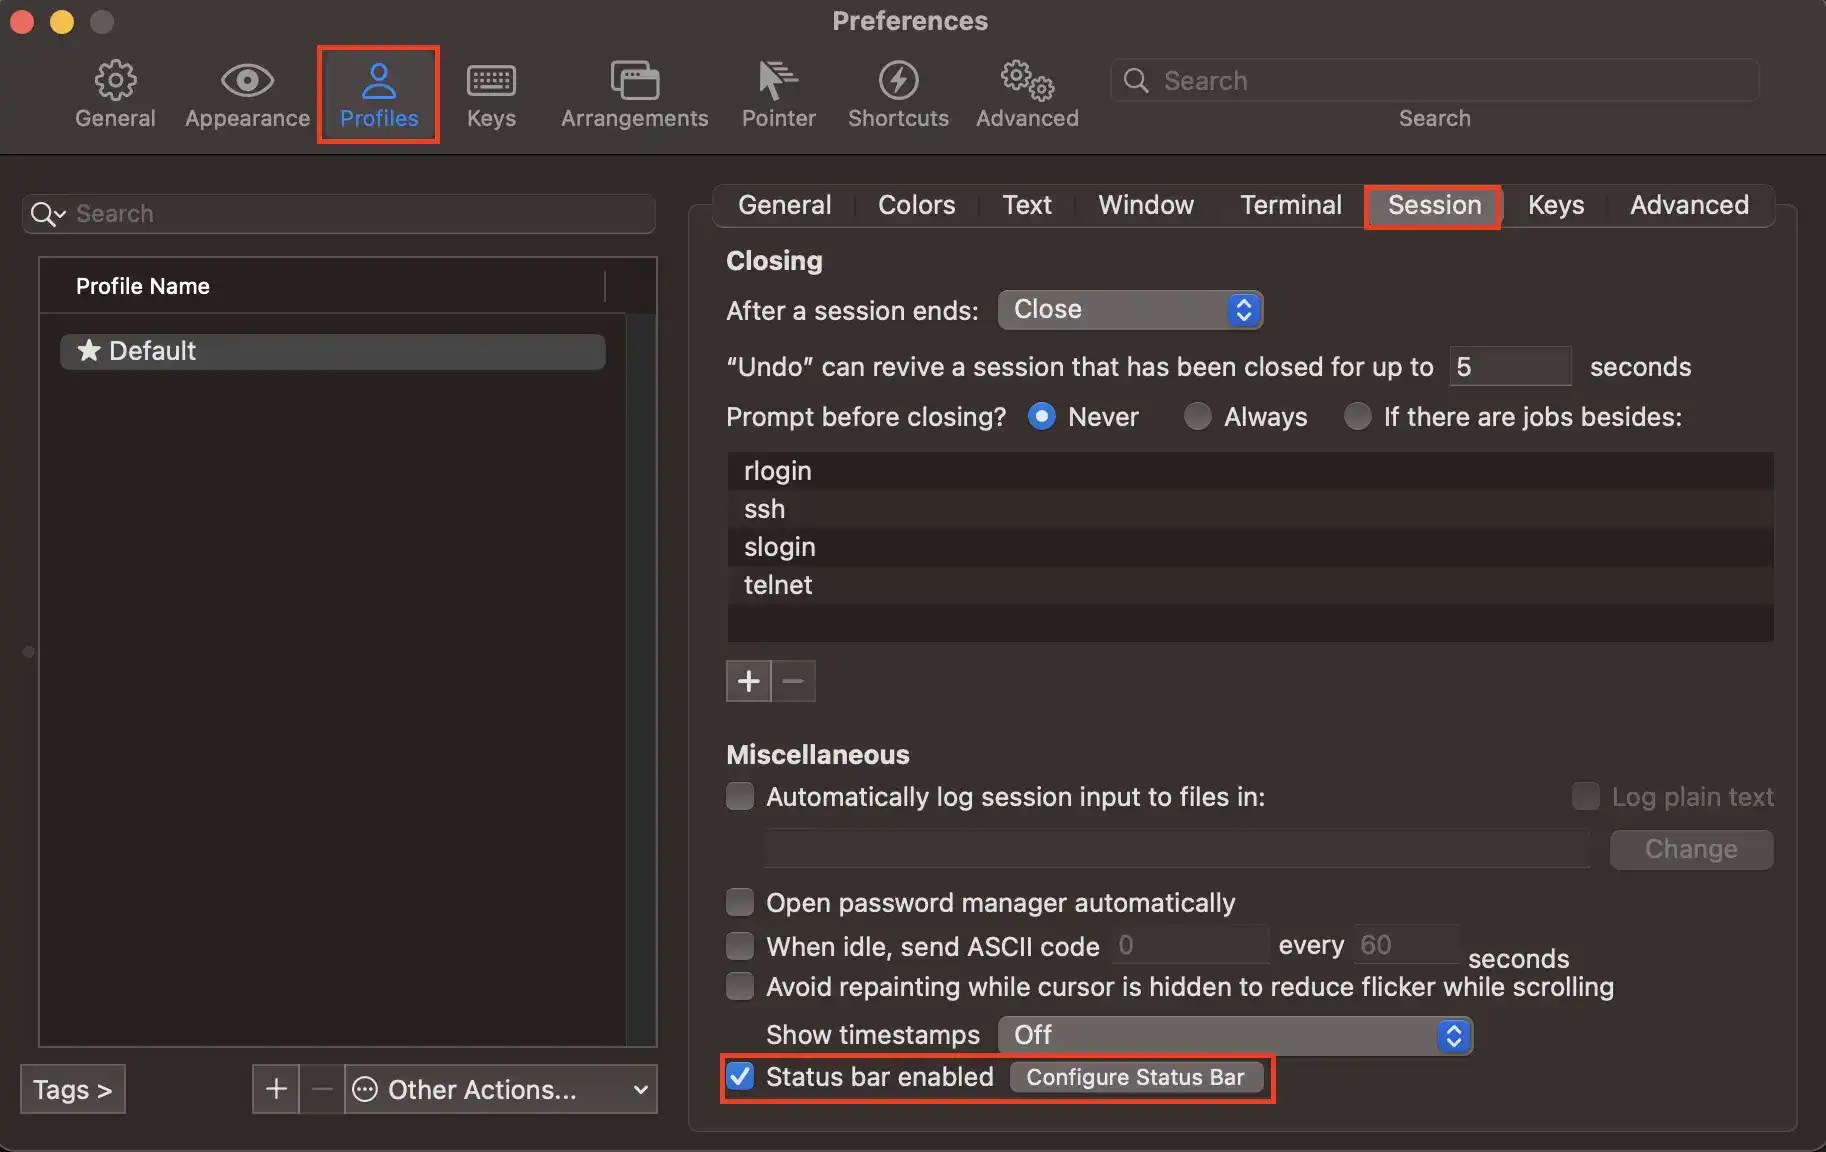
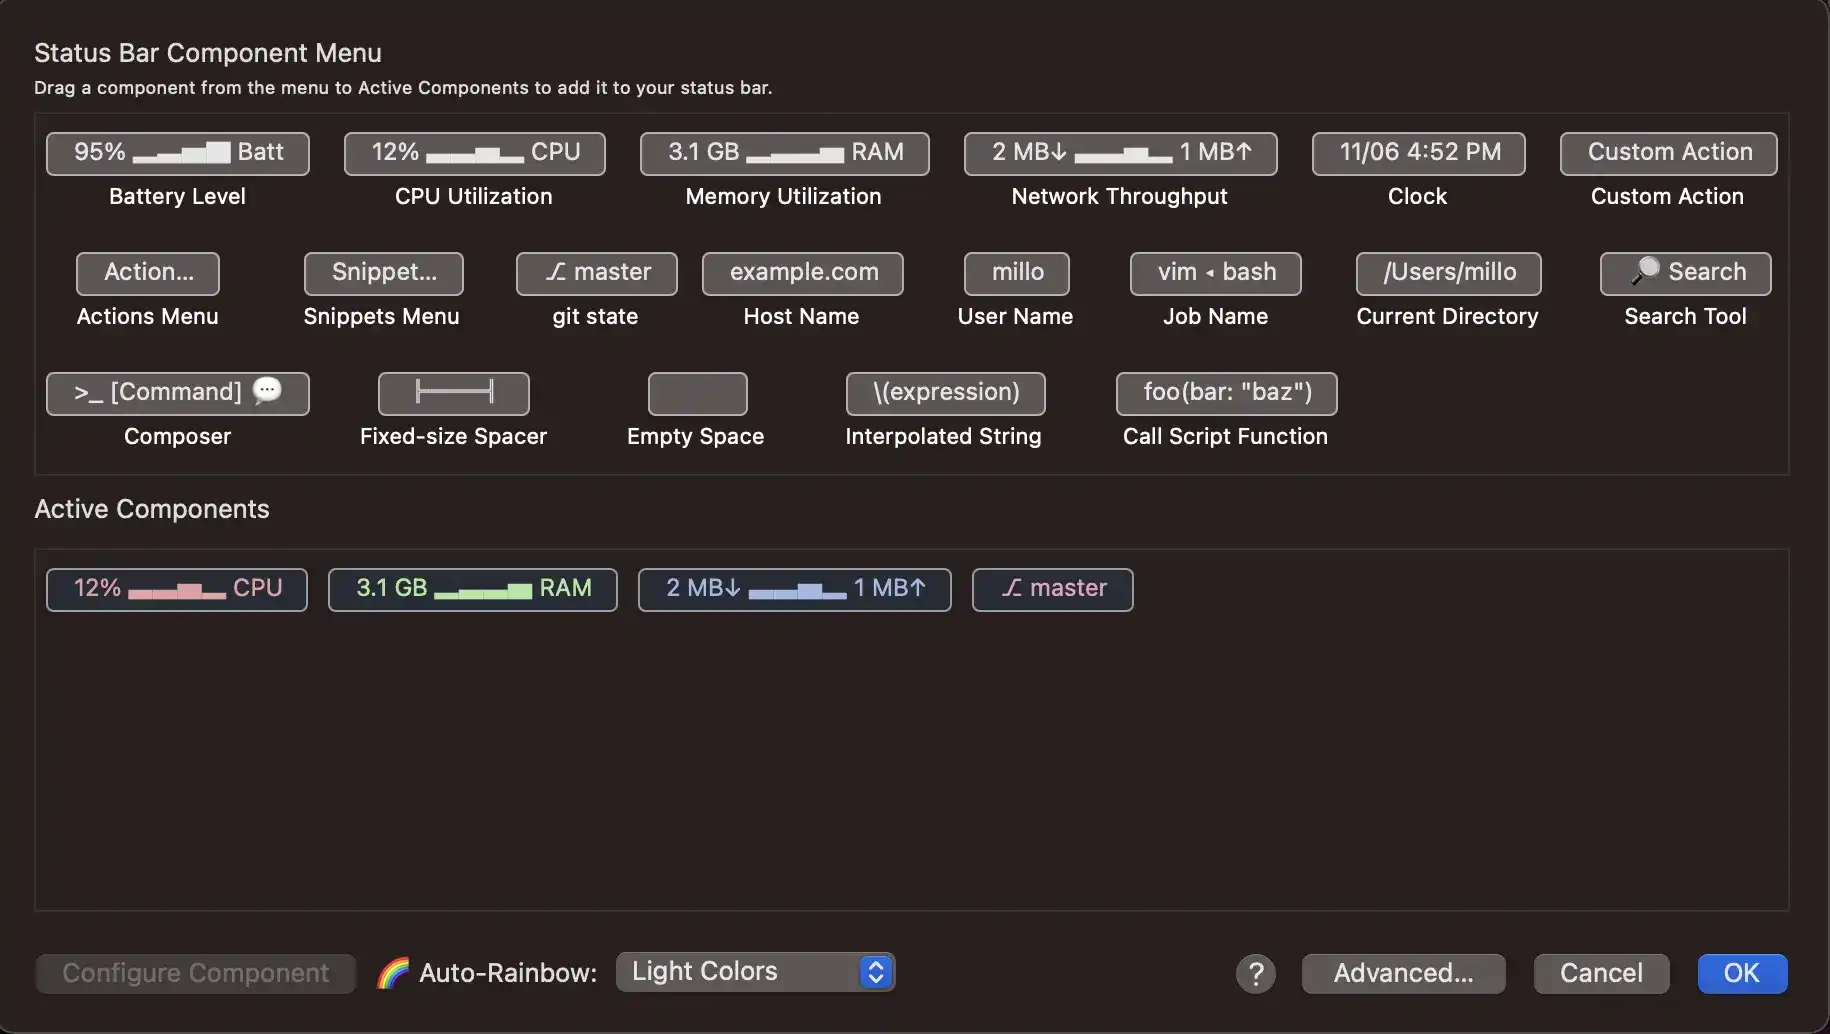
Then, the window below will appear. Click on the component you want to display in the terminal and click OK.
I am using a total of four: CPU Utilization, Memory Utilization, Network Throughput, and git state.
You can select a color theme from Auto-Rainbow at the bottom, so please select your favorite theme.
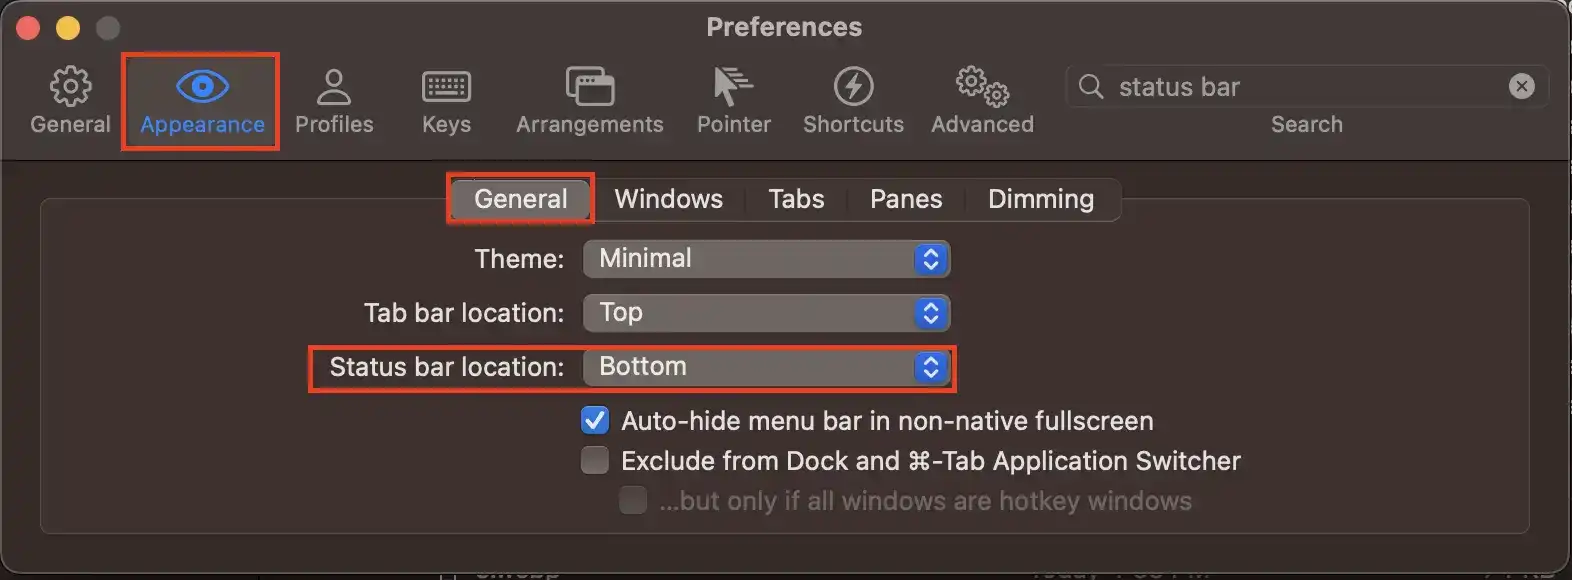
I like the status window at the bottom, so I modified it as shown in the image below, but this is personal preference, so feel free to change it.
You can change it at Appearance -> General -> Status bar location.
Now, let’s install oh-my-zsh’s strongest plugins.
I use the command highlighting plugin zsh-syntax-highlighting and the autocompletion plugin zsh-autosuggestions.
1# zsh-syntax-highlighting2git clone https://github.com/zsh-users/zsh-syntax-highlighting.git ${ZSH_CUSTOM:-~/.oh-my-zsh/custom}/plugins/zsh-syntax-highlighting34# zsh-autosuggestions5git clone https://github.com/zsh-users/zsh-autosuggestions.git $ZSH_CUSTOM/plugins/zsh-autosuggestions
Once the download is complete, open the ~/.zshrc file and edit it.
1vi ~/.zshrc
1# ~/.zshrc2# ...34plugins=(5 # ...6 zsh-syntax-highlighting7 zsh-autosuggestions8 # ...9)1011# ...
After completing the modifications, apply the modifications with the command below.
1source ~/.zshrc
Various themes exist in the iterm2 prompt.
There are several types of the most popular themes, including powerlevel10k, spaceship, and pure. And I am using powerlevel10k, which has the best performance.
I will install and apply powerlevel10k. You can install and apply other themes in a similar way.
1git clone --depth=1 https://github.com/romkatv/powerlevel10k.git ${ZSH_CUSTOM:-~/.oh-my-zsh/custom}/themes/powerlevel10k
After installation is complete, open the ~/.zshrc file and edit the ZSH_THEME entry.
1vi ~/.zshrc
Modify the ZSH_THEME part as shown below.
1# ~/.zshrc23# ...45ZSH_THEME="powerlevel10k/powerlevel10k"67# ...
After completing the modifications, apply the modifications as follows.
1source ~/.zshrc
If you open a new tab after executing the above command, an interactive settings window will pop up and you can set the theme in detail.
If you want to reconfigure, enter p10k configure.
Today, we learned how to install the iTerm2 app and add colorful themes and convenient plugins.
These are the things I use and 100% recommend, so I hope they are helpful to you too.
I recommend that everyone use iTerm well and tune it little by little in the direction you want.